


Ok, here is how I put some backup lighting on my trailer.
I got some LEDs that are rated IP-68 and 860 lumens (quite bright), which means they are dust proof and waterproof greater than 6' (if they are 6' deep, I am in trouble). WARNING - these lights are not cheap, but are the only ones I found that would accomplish what I wanted and the makers guarantee dunking them in water won't hurt them. I actually asked what they recommended for this application, and explained they would be under water frequently, and went with what they said to use.
I wanted to accomplish 4 things with the circuit I designed -
1) have the backup lights come on automatically when the truck is put in reverse
2) be able to turn the backup lights off even when the truck is in reverse to avoid blinding other people at the ramp (kinda like killing your headlights as a courtesy)
3) be able to turn them on whenever I want, no matter what gear the truck is in
4) run as few new wires between the truck and trailer as possible
OK, now for the good stuff. You will need the obligatory wires and crimps, 2 relays (at least one of them needs to be able to pass power thru it even when not energized), and I bought a remote kit that has 2 switches, and each is controlled by the same key fob, with each having it's own set of on/off buttons. The remote kit was ~ 20 bucks, and I had all the other stuff. I also highly recommend a 25' long fish tape to make it very easy to get the wires from the lights at the back of the trailer to the front thru the frame like the factory wires were run (at least on mine).
I did make a plate out of plexiglass to mount the relays and switches to that slides up into the trailer tongue vertically, and then rotates down to horizontal, so it rests on the tubular rails the safety cables are in with the relays/switches on top and out of harms way. No additional holes were needed in the trailer tongue, since I used the same grounding point/screw as the factory ground wire, and the plate I made won't move easily.
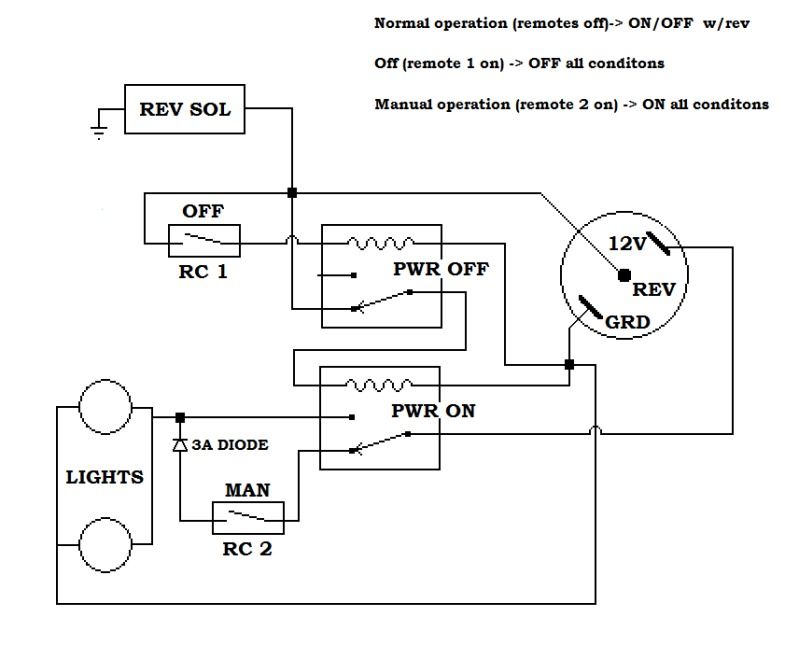
Here is items in the diagram for the circuit I used/designed:
REV SOL = the factory reverse brake lock out solenoid
RC 1 = 1 remote controlled switch
RC 2 = other remote controlled switch
PWR OFF = relay allowing me to kill the lights when truck is in reverse
PWR ON = relay sending 12v to the lights and RC 2 (which allows me to turn the lights on any time)
12V = the 12v constant connection in the 7 pin trailer connector on my truck
GRD = ground connection in the 7 pin trailer connector on my truck
REV = reverse connection in the 7 pin trailer connector on my truck
3A DIODE = I had to add this to ensure there was never 12v on both sides of RC 2 at the same time while it was off/open to make it all work like I wanted
Now, on my truck, the 7 pin - 5 pin adapter was made in such a way that I was able to take the adapter apart and add the wire to get 12V constant to the trailer. The only way you would know is I now have a single red wire that comes out of the adpater and goes to the trailer, in addition to the flat 5 pin connector.
Just wire them up as per the diagram, and you will have some very nice back up lights. To turn them off when in reverse, I just press the button on the remote for switch 1, to turn them back on, turn the switch off. To turn them on any time, just hit the button on the remote for switch 2 (even if the truck is off).
I mounted mine to the trailer using some 'L' shaped brackets I had (actually they were the optional mounting brackets for my ratcheting transom straps I never used), and attached them to the bolt that goes thru the frame and holds on the side step at the rear of the trailer. Mounting them here gives plenty of light, but limits how badly it wil blind someone if you turn them on when they are behind you. It also let me avoid drilling into the trailer to mount them securely.
Diagram
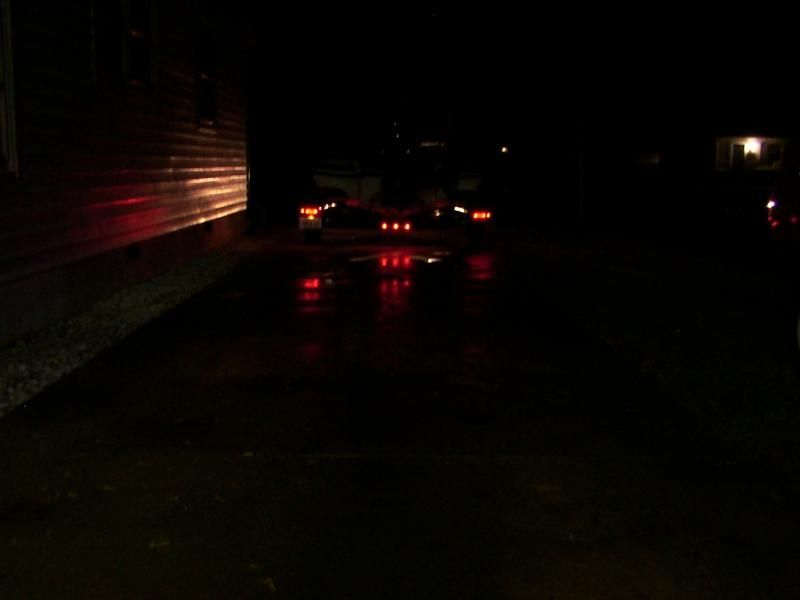
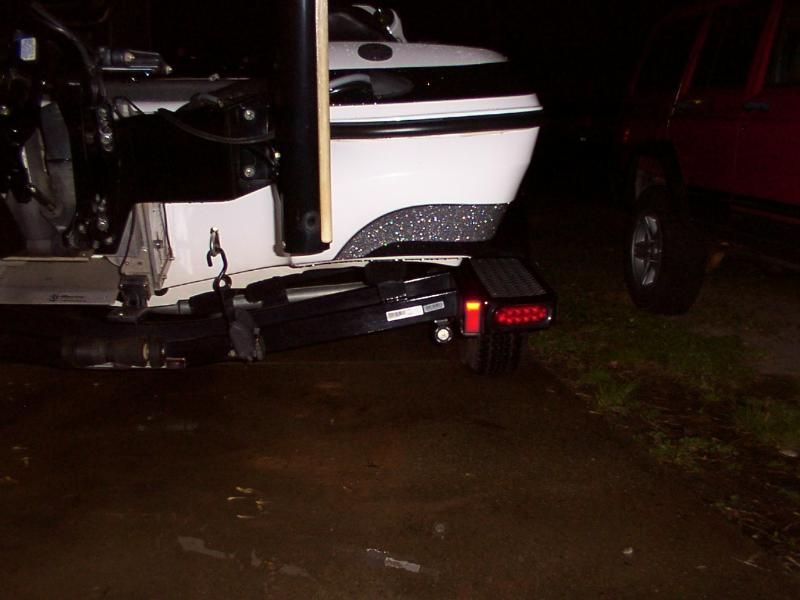
Trailer lights at night
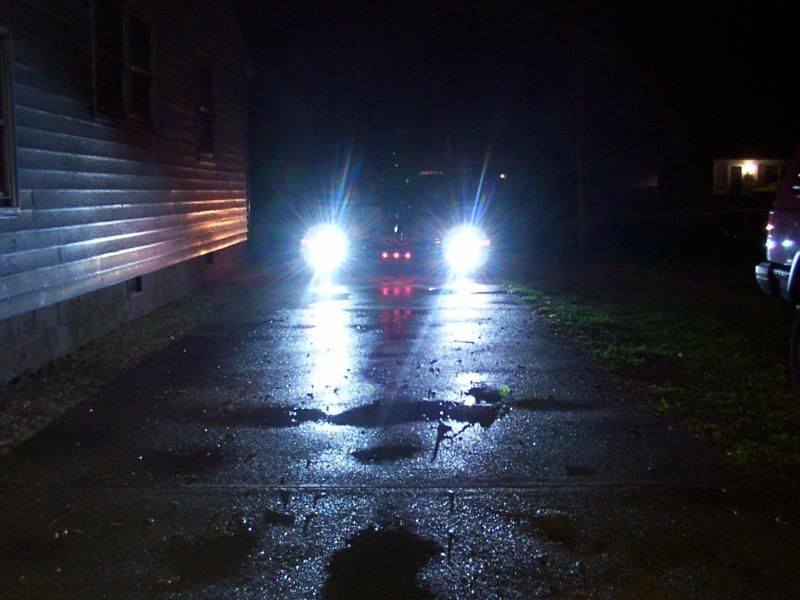
Back-Up lighting (~ 40' away)
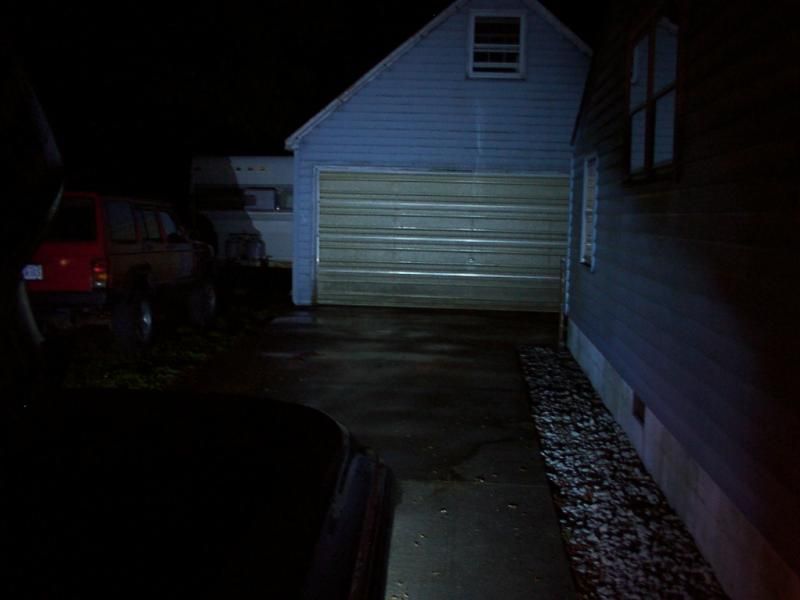
Showing how well they light up the garage door ~ 40' away (they are a TON brighter than it looks in this pic - they are as bright as a 55W halogen headlight)
Close-up of where I mounted them and how small they are (under the sticker on the cross beam)
I got some LEDs that are rated IP-68 and 860 lumens (quite bright), which means they are dust proof and waterproof greater than 6' (if they are 6' deep, I am in trouble). WARNING - these lights are not cheap, but are the only ones I found that would accomplish what I wanted and the makers guarantee dunking them in water won't hurt them. I actually asked what they recommended for this application, and explained they would be under water frequently, and went with what they said to use.
I wanted to accomplish 4 things with the circuit I designed -
1) have the backup lights come on automatically when the truck is put in reverse
2) be able to turn the backup lights off even when the truck is in reverse to avoid blinding other people at the ramp (kinda like killing your headlights as a courtesy)
3) be able to turn them on whenever I want, no matter what gear the truck is in
4) run as few new wires between the truck and trailer as possible
OK, now for the good stuff. You will need the obligatory wires and crimps, 2 relays (at least one of them needs to be able to pass power thru it even when not energized), and I bought a remote kit that has 2 switches, and each is controlled by the same key fob, with each having it's own set of on/off buttons. The remote kit was ~ 20 bucks, and I had all the other stuff. I also highly recommend a 25' long fish tape to make it very easy to get the wires from the lights at the back of the trailer to the front thru the frame like the factory wires were run (at least on mine).
I did make a plate out of plexiglass to mount the relays and switches to that slides up into the trailer tongue vertically, and then rotates down to horizontal, so it rests on the tubular rails the safety cables are in with the relays/switches on top and out of harms way. No additional holes were needed in the trailer tongue, since I used the same grounding point/screw as the factory ground wire, and the plate I made won't move easily.
Here is items in the diagram for the circuit I used/designed:
REV SOL = the factory reverse brake lock out solenoid
RC 1 = 1 remote controlled switch
RC 2 = other remote controlled switch
PWR OFF = relay allowing me to kill the lights when truck is in reverse
PWR ON = relay sending 12v to the lights and RC 2 (which allows me to turn the lights on any time)
12V = the 12v constant connection in the 7 pin trailer connector on my truck
GRD = ground connection in the 7 pin trailer connector on my truck
REV = reverse connection in the 7 pin trailer connector on my truck
3A DIODE = I had to add this to ensure there was never 12v on both sides of RC 2 at the same time while it was off/open to make it all work like I wanted
Now, on my truck, the 7 pin - 5 pin adapter was made in such a way that I was able to take the adapter apart and add the wire to get 12V constant to the trailer. The only way you would know is I now have a single red wire that comes out of the adpater and goes to the trailer, in addition to the flat 5 pin connector.
Just wire them up as per the diagram, and you will have some very nice back up lights. To turn them off when in reverse, I just press the button on the remote for switch 1, to turn them back on, turn the switch off. To turn them on any time, just hit the button on the remote for switch 2 (even if the truck is off).
I mounted mine to the trailer using some 'L' shaped brackets I had (actually they were the optional mounting brackets for my ratcheting transom straps I never used), and attached them to the bolt that goes thru the frame and holds on the side step at the rear of the trailer. Mounting them here gives plenty of light, but limits how badly it wil blind someone if you turn them on when they are behind you. It also let me avoid drilling into the trailer to mount them securely.
Diagram
Trailer lights at night
Back-Up lighting (~ 40' away)
Showing how well they light up the garage door ~ 40' away (they are a TON brighter than it looks in this pic - they are as bright as a 55W halogen headlight)
Close-up of where I mounted them and how small they are (under the sticker on the cross beam)
")